Kayak Camping Ultimate Guide: Tips on Packing, Gear, and Awesome Locations!

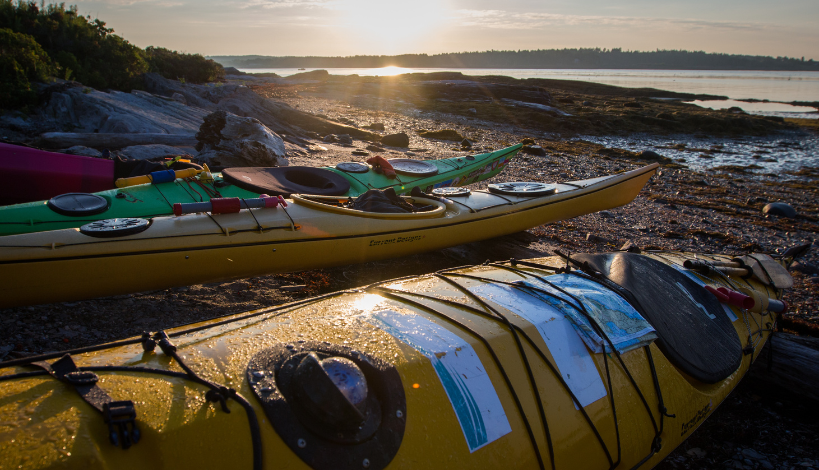
Kayak camping is an adventure sport that combines the thrill of kayaking with the joys of camping. It is one of the awesomest ways to explore nature and create lasting memories while getting away from it all. When I say awesomest, I mean it! I’ve been kayak camping only twice and both times, it was epic.

So in this article, I’m going to share as much as I can about kayak camping: what it is, what to pack, what to expect, and so much more! Off we go…

What is Kayak Camping?

man equipping his kayak to go kayak camping

Kayak camping allows you to experience hard-to-find spots that may not be accessible by foot or car. Whether you want to spend a few days out in the wilderness or just have a quick overnight trip, kayak camping provides an exciting way to enjoy the outdoors.

With its unique combination of tranquility and excitement, combining camping and kayaking will provide you with an unforgettable experience that will stay with you for years to come. I am going to provide you with the information you need to know before you head out on your adventure.

What You Need To Get Started With Kayak Camping

In this section, I’m going to tell you about everything you need to have a safe kayak camping trip!

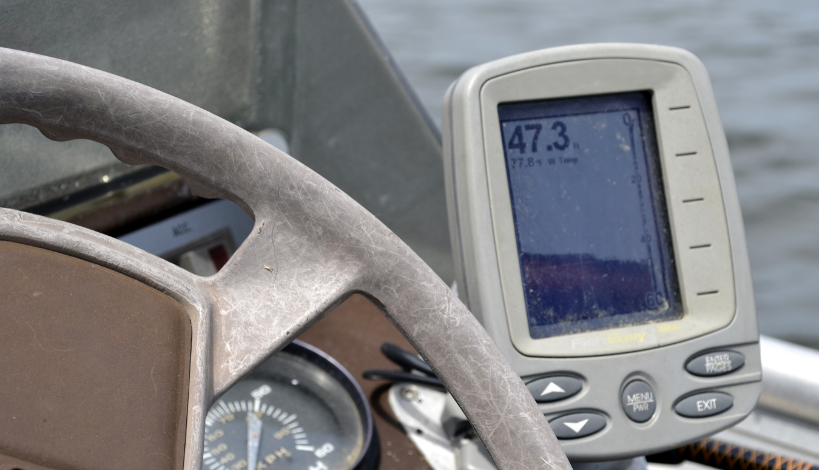
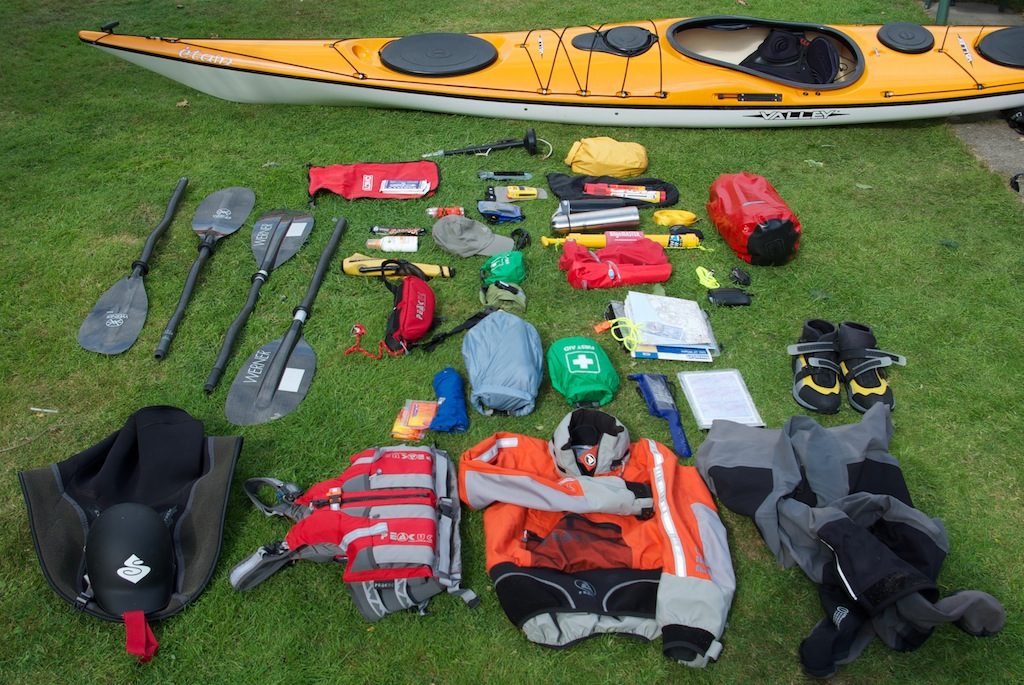
Essential kayak camping gear includes a reliable kayak that can handle various water and weather conditions, a life jacket, and waterproof clothing including pants, jacket, and gloves. You’ll also need an anchor system for your boat, storage containers or bags for your supplies, dry bags to keep items safe from water damage, and a bilge pump to remove any water that leaks into the kayak.

You should also bring along the appropriate camping equipment such as a tent with a fly sheet (to protect you from the rain), a sleeping bag and pad/mattress, a lightweight stove with fuel canister(s) (depending on how long you plan to stay out in the wilderness), a set of pots and pans for cooking meals and boiling water for drinking/cleaning dishes/etc., eating utensils, a lamp, and a first aid kit with band-aids/gauze, pain meds, an antiseptic, and antihistamines.

essential gear for a kayaking and camping trip that is out in the sun, drying

What might also be included is a folding knife or multi-tool for preparing food & emergency repairs of equipment or clothing, and a flashlight and headlamp with extra batteries (if necessary). For additional safety, it’s important to carry your mobile phone in a waterproof case along with a personal locator beacon in case of emergency situations.

Finally, don’t forget other important items such as sunscreen and insect repellant for protection against sunburns and bugs respectively, trash bags for disposing of waste materials responsibly, maps of the area so you know where you’re going, and water filter/purification tablets in case there are no available sources of clean drinking water.

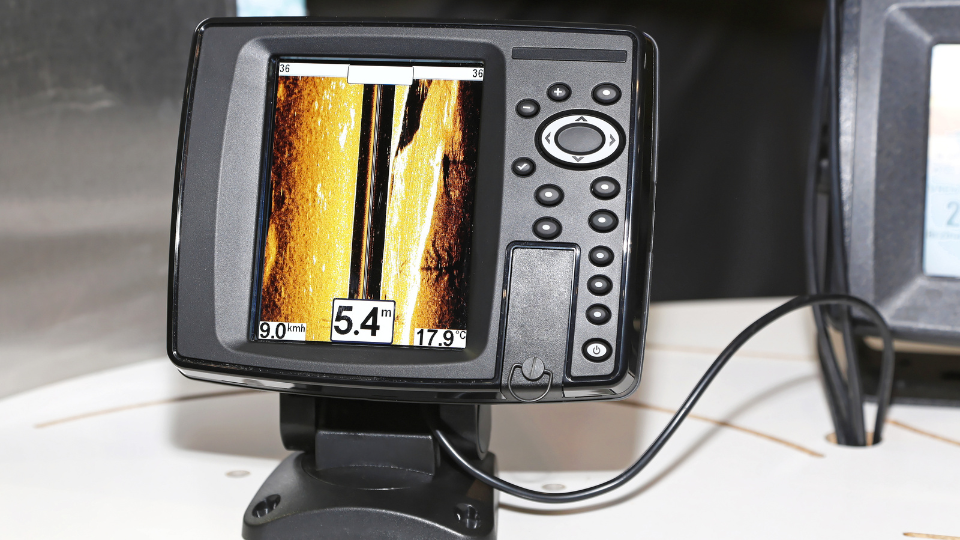
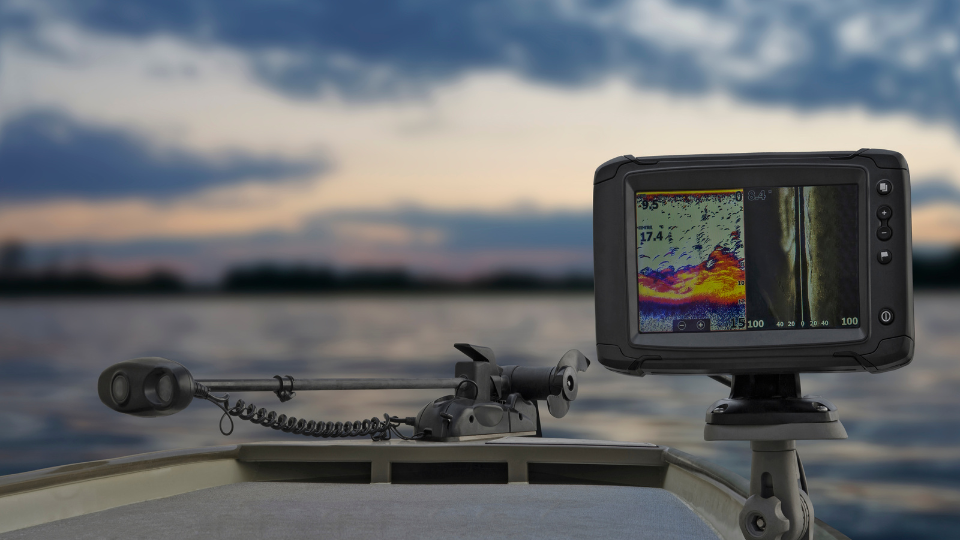
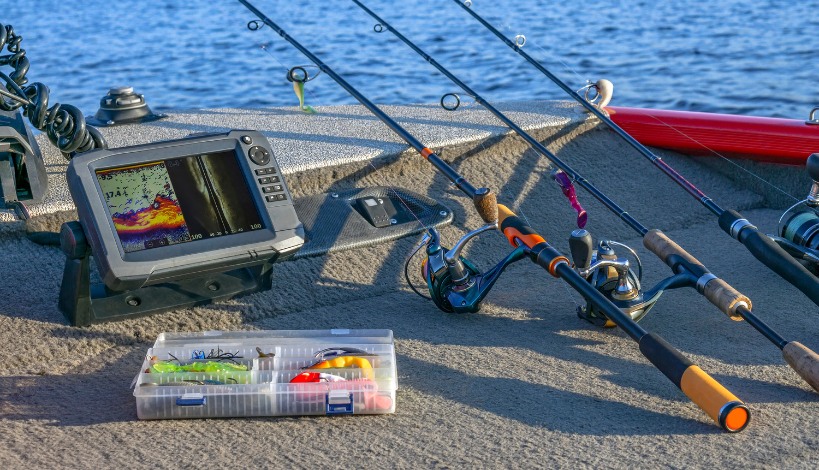
You could bring a book, playing cards or fishing gear if desired, spare parts like rope and duct tape in case anything breaks while out on the water, plus enough food to last until your next destination or return home.

There’s a nice amount of preparation involved with these trips. When I go on a trip, I start packing two days ahead of time! If you pack things in a hurry, you may forget vital items, so it’s good to actually make a list first.

Just in case you need to print the list, here’s a bulleted list of items and gear I mentioned in this section:

  • Kayak
  • Life Jacket
  • Waterproof Clothing (pants, jacket, gloves)
  • Anchor System for the Kayak
  • Storage Containers/Bags for Supplies
  • Dry Bags to Keep Items Safe from Water Damage
  • Bilge Pump to Remove Water Leaking Into the Kayak
  • Tent with Fly Sheet
  • Sleeping Bag/Pad/Mattress
  • Lightweight Stove with Fuel Canister(s)
  • Pots and Pans for Cooking Meals & Boiling Water
  • Eating Utensils
  • Lamp
  • First Aid Kit
  • Folding Knife or Multi-Tool
  • Flashlight & Headlamp
  • Extra Batteries if Necessary
  • Waterproof Case for Mobile Phone
  • Personal Locator Beacon
  • Sunscreen and Insect Repellant
  • Trash Bags
  • Maps of the Area
  • Water Filter/Purification Tablets
  • Book/Playing Cards/Fishing Gear
  • Spare Parts (Rope & Duct Tape)
  • Enough Food to Last Until Your Next Destination or Return Home

Now that you have a full list of items and gear for kayak camping, it’s time to talk about the actual trip!

What to Expect During Your Kayak Camping Trip

A kayak camping trip is an adventure that will stay with you for years to come. It’s filled with thrilling moments, breathtaking views, and unforgettable memories. For those who deal with anxiety, you will need to manage it but hopefully, this section can give you a heads up on what to expect.

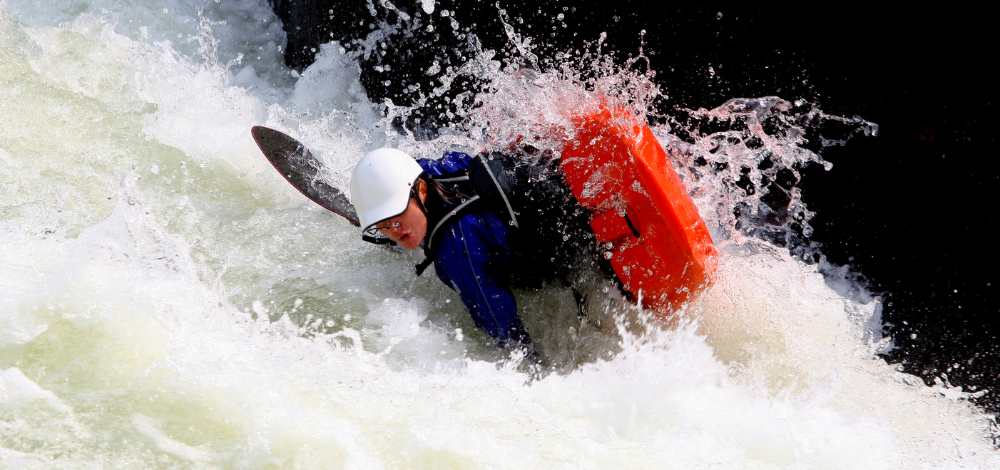
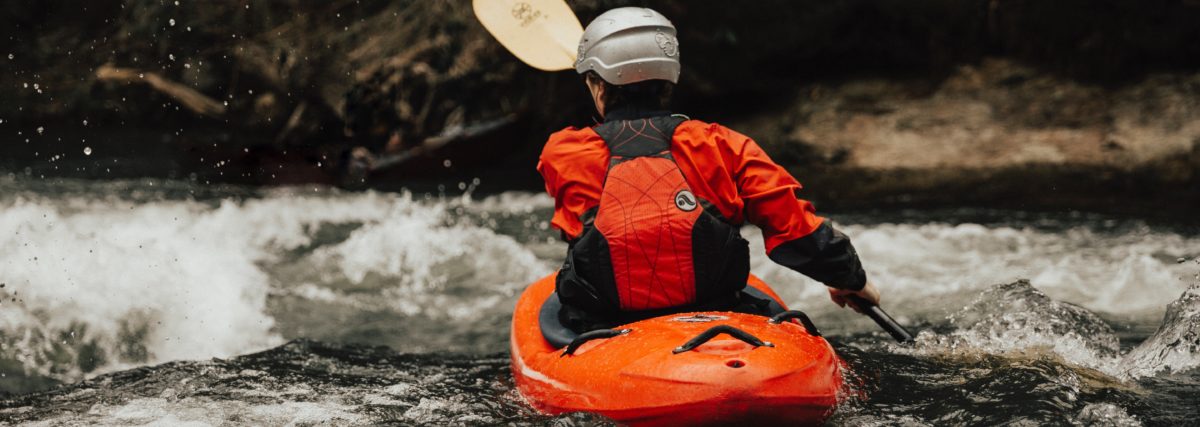
When out on the water, expect to encounter various conditions like choppy waters, strong winds, and maybe even a few rough waves. Make sure to know your limits and stay within them – keep track of the weather conditions in the area before heading out on your kayak.

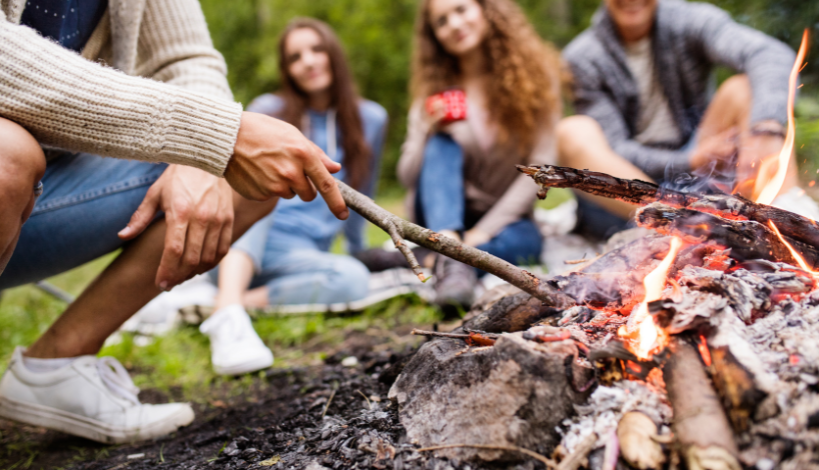
Also expect nights filled with sounds you’ve never heard and stars that seem close enough to reach out and touch. I often take breaks during my trips just to gaze up at the night sky – it’s truly breathtaking. But also, if you’re not used to the sounds of nature, you might find it hard to sleep.

The most important thing to remember is to respect nature; leave no trace of your trip by taking away all trash and other waste materials.

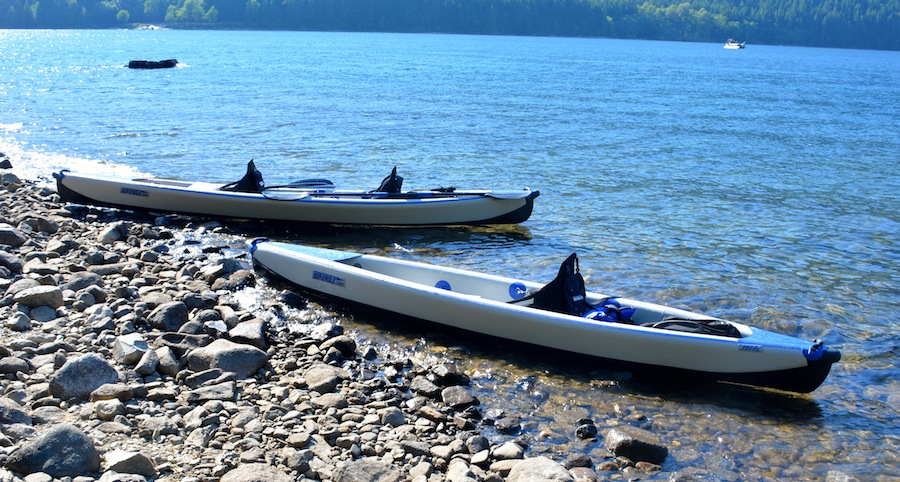
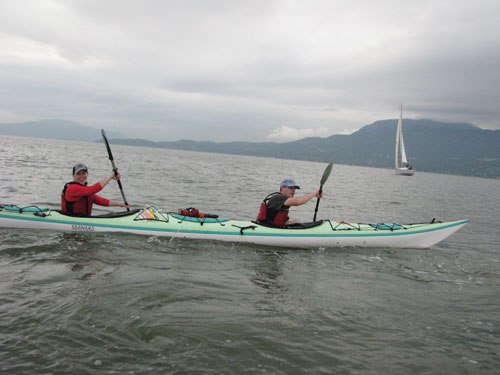
Choosing The Right Kayak For Your Camping Trip

When it comes to choosing the right kayak for camping, there are a few factors to consider in order to have the best experience.

It is important to take into account the type of water you’ll be paddling on, your level of expertise with kayaking and camping, and the size and weight capacity of the kayak.

#1. Touring Kayak for a Calm River or Lake

passat kevlar kayak

There are, as you may know, three main bodies of water and they are rivers, lakes, and the open ocean.

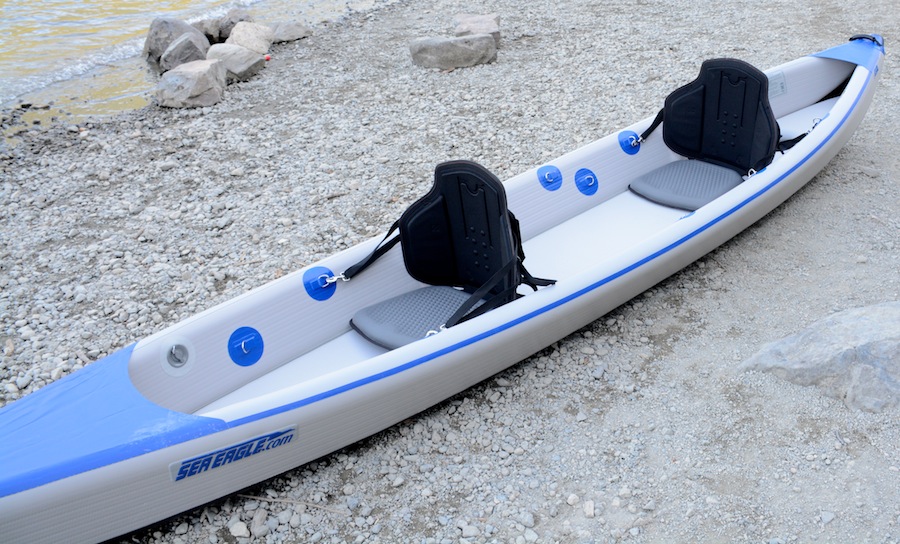
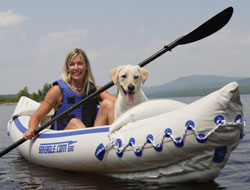
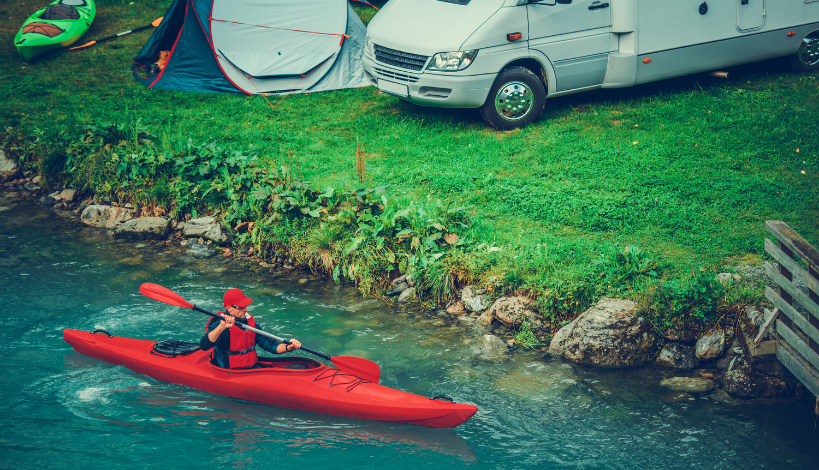
If you plan on camping on a calm river or lake, you will want to choose a thin kayak with storage compartments (or a tandem so you can put equipment in the spot where someone else usually is, if you’re going alone) as they offer excellent stability and maneuverability when navigating through tight spaces or shallow waters.

#2. Sit-in Fishing Kayak for Open Ocean Waters

Hobie 14

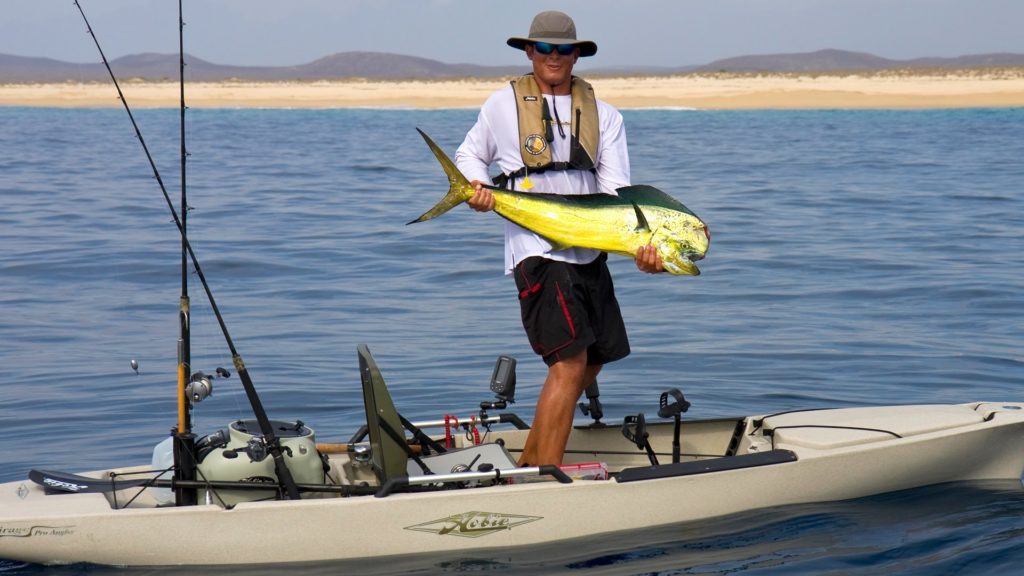
For those venturing out in open ocean waters, a sit-in fishing kayak (or a sea kayak) would provide ample room for camping gear and better protection from windy conditions.

You could go fishing on the way to your destination, put the fish on ice until you get there and can build a fire to cook it.

#3. Wide Kayaks for Beginner Campers

It is also essential that you consider your level of expertise with both kayaking and camping before selecting a kayak. Beginner campers should look for wider models that offers stability while more experienced campers may prefer longer models with more speed capabilities.

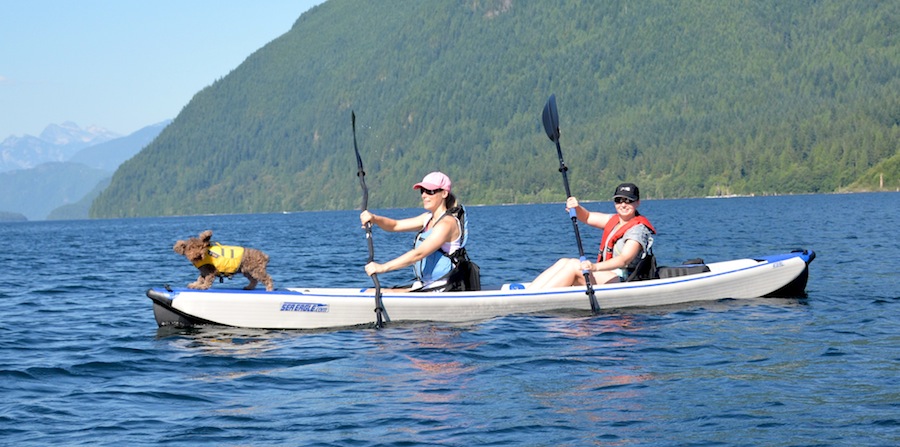
Additionally, some models are designed for solo trips while others are better suited for groups due to their increased weight capacities. There is also a 3-person kayak so you can take someone else and put your equipment in the other space.

Just be sure not to overpack the boat so it’s stable enough to get where you’re going.

Tips For Packing Lightly And Efficiently for Your Kayak Camping Trip

tired woman napping in her kayak

Packing efficiently for a kayak camping trip requires careful planning and forethought. When packing, it’s important to consider the size of your kayak and the duration of your trip so that you can plan accordingly.

For each item on your list, try to choose lightweight versions wherever possible. This can make or break your trip! If your supplies make the kayak too heavy, it will hold you back on your kayaking and camping trip.

Freeze Dried and Dehydrated Foods Can Help

If possible, consider bringing freeze-dried or dehydrated food which is both lightweight and easy to prepare. Pack multipurpose items such as folding camping chairs that can also be used as tables or storage containers.

Versatile Clothing is Important

When it comes to clothing, pack items that are versatile and capable of layering depending on the weather conditions you may encounter throughout your trip.

Bring mostly quick-drying fabrics that can keep you warm when wet, but still allow for air circulation in hot climates. Also remember to bring extra socks and comfortable shoes in case you need them for unexpected adventures.

Final Tips for Packing

Finally, make sure you have enough room in your kayak for all of the items listed above before adding any extras. Packing lightly is key when it comes to kayak camping; avoid bringing anything bulky or unnecessary so you don’t weigh down your craft or use up valuable space inside the cockpit area.

With careful planning and strategic packing strategies, you’ll be ready for an unforgettable camping experience out on the open waters.

Where To Find Good Destinations For Kayaking Adventures

a bunch of kayaks readied for long camping trips

For those looking for the perfect kayaking adventure destination, there are plenty of amazing locations throughout the world. When you find one, it would be a good idea to research the area first and to go with a couple of buddies until the area becomes more familiar or predictable for you.

You’d want to know what animals you may encounter, how the weather is there normally, how cold it gets at night, the insects that might bother you (I suggest taking a mosquito net, just in case), etc.

Location Recommendations for Camping in Your Kayak!

camping kayakers on the shore of a beach taking a rest

In North America, the west coast of Canada offers some of the best spots for kayaking. The coastlines of British Columbia, Washington, and Oregon all have stunning scenery and plenty of wildlife to spot along your journey.

Notable kayaking locations on the west coast include Desolation Sound in British Columbia, San Juan Islands in Washington, and Nehalem Bay in Oregon.

For those looking to go further south, California has some excellent kayaking spots along its coastline. You’ll find crystal clear waters among picturesque cliffs at La Jolla Cove near San Diego or Morro Bay near San Luis Obispo.

Further north, you can adventure along the Mendocino coastline where you may just spot sea lions or gray whales swimming near your boat!

If you live on the east coast, there’s Caledon State Park on the Potomac River in Virginia with trails, bird watching, and campsites only accessible by hiking or paddling. In Maryland, there’s Assateague Island, where you can view the wild horses while on your kayak and go on a guided tour if desired, but you’d need a camping permit.

In Florida, there’s the Everglades National Park where you can camp in the wilderness but you need a permit and the cost of camping per night. Further north, there’s the Allagash River in Maine where you can hire guides if you want that will help you with your equipment and trip and you can rent cabins there as well as an extra option.

If heading overseas is more your style, then Norway should be high on your list of destinations for an epic kayak outing. With its fjords and incredible landscapes, it’s easy to see why Norway is one of Europe’s top kayak destinations.

Popular places for sea kayaking include two fjords in Alesund (Geirangerfjord and Hjørundfjord) where you can explore tiny fishing villages tucked away by mountainsides and spot seals basking upon rocky shores!

If you’re looking for a tropical experience while still enjoying some outdoor adventure activities such as kayaking, then Thailand should be considered for an unforgettable excursion. There are many secluded islands there that offer white sand beaches with crystal clear turquoise waters, just waiting to be explored! The island of Koh Yao Noi is well known for its tranquility, as well as its abundance of exotic marine life that can often be seen swimming close by during a day out on the water.

From North America’s rugged west coastline all the way across to Thailand’s tropical seaside paradise, there are countless opportunities available no matter what location suits your needs best.

In case you want to add all the locations I’ve mentioned above to your bucket list, here are all those locations listed in bullet form below:

  • Desolation Sound, British Columbia
  • San Juan Islands, Washington
  • Nehalem Bay, Oregon
  • La Jolla Cove, California
  • Morro Bay, California
  • Mendocino Coastline, California
  • Caledon State Park, Virginia
  • Assateague Island, Maryland
  • Everglades National Park, Florida
  • Allagash River, Maine
  • Geirangerfjord and Hjørundfjord, Norway
  • Koh Yao Noi, Thailand

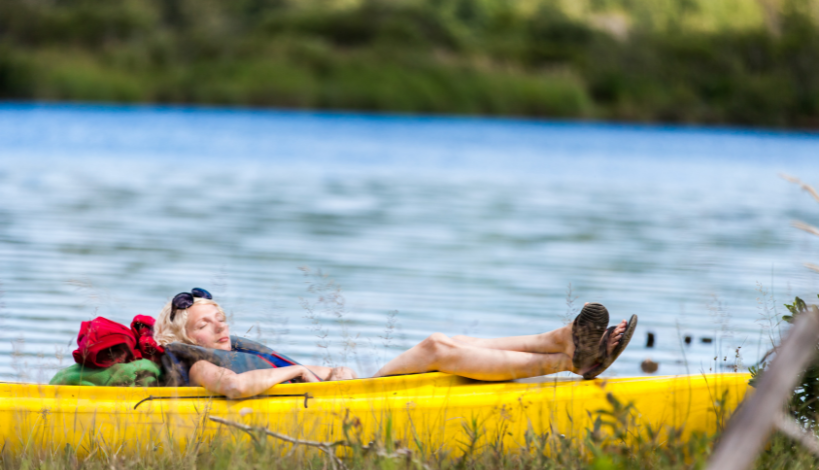
The Benefits Of Kayak Camping

excited campers around a bonfire

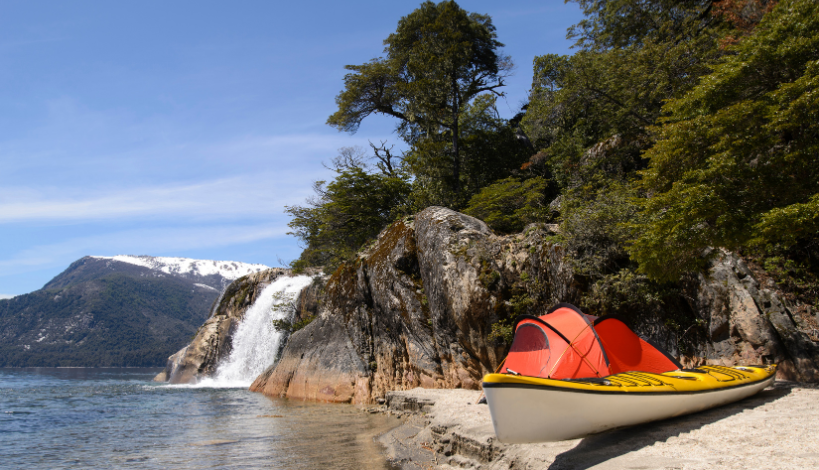
Kayaking is a fantastic way to stay active while camping. You’ll work out your arms, back, core, and legs as you paddle along rivers, lakes, or the open ocean. Plus, you’ll get an incredible view of the surrounding landscape as you move along, something no ordinary campsite could offer.

Another huge benefit of kayak camping is that since you can only take so much equipment at once, it’s extremely lightweight and easy to transport when compared to traditional camping gear. With a few lightweight items like a tent, sleeping bag, water filter, cookware set, etc., you can easily carry all your essentials for days of adventuring without breaking your back (or bank).

For those like me who passionately love wildlife viewing opportunities, kayak camping provides some truly amazing experiences. Kayaks are stealthy vessels that allow you to sneak up close to wildlife without disturbing them giving you access to picturesque views and special moments with animals in their natural habitat.

Overall, kayak camping is an incredibly rewarding experience for anyone looking for an adventurous getaway in nature. For me, personally, it has snapped me out of depression and anxiety and provided much needed relief a couple of times in my life. Highly consider it if you enjoy kayaking and/or camping!

Safety Considerations When Planning Your Trip

Kayaking safety equipment

When kayak camping, safety is paramount.

Before embarking on a kayaking trip, it is important to be familiar with the basics of water safety. Kayakers should make sure they know how to use all of their safety equipment properly and always wear a life jacket or personal flotation device (PFD).

It’s also important for kayakers to know the local weather forecast and plan trips accordingly, avoiding high wind speeds and choppy waters.

Before leaving shore, make sure you have enough food and clean drinking water for your trip, as well as an emergency communication system in case something goes wrong. Tell someone your itinerary before departing so that if necessary, they can contact emergency services if you don’t return by a certain time.

Keep an eye on the other boats and people in the area to avoid collisions or dangerous situations. While night kayaking is generally discouraged due to reduced visibility, if it is unavoidable, then take extra caution when navigating unknown waters and carry a bright flashlight or headlamp that can help provide better visibility in dark conditions.

Finally, be aware of any hidden hazards like rocks or underwater objects that could damage your boat or cause injury; paying close attention to charts or navigation apps can help you steer clear of these types of areas. Take some protection against animals and insects, and even other humans (I had to say it), because you never know what you might run into in the woods.

I want to emphasize this as much as possible: if it’s your first time kayak camping, please go with at least one other experienced buddy.

Is It Possible to Sleep in a Kayak?

Yes, it is possible to sleep in a kayak! It can be uncomfortable and tiring, but with the right preparation and safety measures taken, you’ll be able to comfortably spend a night out on the water.

First off, make sure that your kayak is well-suited for overnight camping. Most recreational or touring kayaks are designed to fit two people, so if you’re camping solo, make sure that your kayak is large enough for you to stretch out and even sleep diagonally. It’s also important to properly secure your gear in the kayak before going to sleep; otherwise, it could easily be swept away by waves or wind during the night!

When it comes to sleeping in your kayak, you’ll need a few must-have items like an insulated and waterproof sleeping pad, a suitable sleeping bag, and a camping pillow. If it’s particularly cold outside, you may want to bring along a few extra layers of clothing or an emergency blanket for added warmth.

In order to make sure your kayak is secure while you sleep, it’s important to find a safe spot to camp. If you can, look for a shallow, calm area of the water where your kayak won’t drift away in the night. Make

How Many Dry Bags for Kayak Camping?

a-fishing-kayak-ready-to-for-a-trip-with-a-fish-finder-setup

The number of dry bags you’ll need for kayak camping depends on how many items you plan to bring. Generally, two or three dry bags should be more than enough to fit all your belongings, including food and snacks.

If you’re planning a long-distance trip with multiple days of camping, you may want to add an extra dry bag or two for items like clothing and sleeping gear.

It’s also important to make sure your bags are waterproof, so check the seams of each bag before packing it. For added protection against water, consider storing your items in plastic bags or garbage bags before putting them into the dry bags.

Where Do You Put Your Bag in a Kayak?

Most recreational or touring kayaks have designated storage areas in the front and rear hatches. You can fit one large dry bag in each hatch, depending on the size of your boat.

If you’re short on space, you can also securely tie smaller items onto your kayak with bungee cords or straps. For additional storage, you can tie a floating dry bag on the back of your boat.

When packing, it’s important to keep in mind that anything stowed away should be kept as far away from the cockpit and feet as possible. This will help with balance and comfort while paddling. Also, make sure all items are securely tied down so they won’t shift or move around with the waves.

In Summary

Not only does it provide a great way to get out in nature and explore, but it also gives you the opportunity to challenge yourself physically while reaping the benefits of being close with friends or family.

With some basic knowledge and gear, anyone can enjoy kayaking and camping on their own terms. Whether you’re looking for a weekend trip away from civilization or just want to experience something new, kayak camping may be right for you!

Trust me, you’ll thank yourself like I have in the past and kayak camping is as cheap and as nature loving as it gets!

Fish Finder vs Camera: Which One Is Better?

When you’re out kayak fishing, it can be challenging to locate fish hiding beneath the water’s surface. For that reason, some kayakers use fish finders or cameras. But which one is best for you?

Lucky for you, I’ve used both so in this article, I will share the advantages and disadvantages of both fish finders and cameras so you can make an informed decision about which one to choose.

Fish Finders for Kayaks

a fish finder on a kayak

Fish finders are devices that use sonar waves to detect fish and other objects beneath the surface of the water. They come as standalone units that you can mount on your kayak or as handheld devices that you can attach to your fishing rod or kayak.

Fish finders produce images that show the location of fish in the water column, as well as the depth and structure of the waterbed. The advantage of using a fish finder is that it can detect fish and at times, sharks, in deeper waters and provide a more accurate detection of the species present.

However, they can be relatively pricey and you may need to spend extra to get additional features such as GPS and mapping.

Cameras for Kayaks

Cameras are another option for kayakers to explore the water and look for fish.

Underwater cameras are available as both portable or mountable units that offer high-quality images of the water bottom. They are suitable for those who plan to explore shallow waters.

A fantastic advantage of using an underwater camera is that it provides a more realistic view of the waterbed than a fish finder. You can see the fishies in their natural habitat and watch their behavior.

However, the downside to using a camera is that these cameras are not as effective in deep water and unfortunately there is a steep learning curve to interpreting what you see on the screen.

Costs of Fish Finders vs Cameras

The cost of the fish finder or camera will also play into your decision.

A basic fish finder can cost as little as $100 while a more advanced one that comes with additional features can cost anywhere from $300 to $1,000.

With a camera, there are similar price ranges but the key difference is that you may need additional gear, such as a monitor, to view the images.

Ease of Use When Comparing Both Devices

fish finder setup

Ease of use is also a factor to consider when making a decision between a fish finder and camera. I hate equipment that is hard or inconvenient to use so this is a big factor for me.

Fish finders are designed to be used by fishermen for identification and locating fish, making them user-friendly.

On the other hand, cameras require a bit of skill as the user must understand how to interpret what they see on the screen and make observations accordingly.

Cameras generally take more time to use, and if you are not tech-savvy, this can be frustrating. Personally, I found fish finders much easier to use than these cameras and I’m glad I was playing with a friend’s camera instead of buying one and finding this out the hard way.

Setup Considerations for Both Equipment Types

The setup for both fish finders and cameras is relatively straightforward.

Fish finders usually come with easy-to-follow instructions so you can typically get it up and running in just a few minutes.

Cameras are more complicated as most require an external monitor to view the images. Also, depending on your kayak’s setup, you may need additional mounting accessories for the camera. It was too bulky of a setup for my tastes.

Are Underwater Cameras Worth It?

If you are looking for a device that can provide images of fish in deeper waters and get detailed information about the waterbed, then a fish finder may be your best bet.

However, if you want to explore shallow waters and gain insight into the behavior of fish, then an underwater camera is the better choice.

When is a Flasher Better?

A flasher is a type of fish finder that produces an image that looks like a pulse graph.

It’s typically used by experienced kayakers who want to locate large schools of fish and can be more effective in deeper waters than a traditional sonar-based fish finder.

If you are looking for detailed information about the waterbed and the location of large schools of fish, then a flasher may be your best bet.

However, it is important to note that flashers tend to be more expensive than traditional fish finders, and you may need additional accessories for mounting and viewing the images.

Do Cameras Scare Fish Away?

Underwater cameras can be used to observe fish in their natural habitat and they do not usually scare them away. But if you are using an LED light on the camera, then it is possible that you will scare some fish away.

To avoid this, make sure to set your camera up in areas where there is plenty of cover for the fish to hide, and turn down the brightness of your LED light. Try not to move around too much while using the camera.

Do Fish Finders Scare Fishies?

fish-finder-with-sonar-tech

Fish finders use sonar waves to detect objects beneath the surface of the water, and these waves can be disruptive for fish.

In general, it is best practice to keep your fish finder off when you are not actively looking for fish. This will help reduce disruption to the natural environment and ensure that the fish feel safe in their surroundings.

Also, make sure to set your fish finder up in areas where there is plenty of cover for the fish to hide and avoid putting it near shallow areas.

Whichever one you use, remember to respect the environment!

Which One Should You Buy?

Overall, the choice between a fish finder and a camera for kayakers depends on the species of fish you are trying to catch and conditions in which you are fishing.

If you are a beginner kayaker and fishing in deeper waters, a fish finder might be the best choice for you. If you prefer to explore shallower waters and watch the fish in their natural habitat, then a camera might be the better option.

Hopefully, this article helps you make a good decision and if you have any questions, please leave them in the comments section.

Sea Eagle vs Intex: Which One Produces the Better Kayak?

Have you been eyeing inflatable kayaks but can’t make up your mind between the Sea Eagle inflatable kayaks vs the Intex ones?

Man, I remember when I started kayaking and I started viewing my options for buying one. I remember taking forever to decide which one I wanted and today, I’m going to share everything about these two companies and their products as well as my top recommendations from both!

Sea Eagle vs Intext Inflatable Kayaks: 4 Main Factors to Consider

Sea Eagle Razorlite on the water

The Sea Eagle and Intext inflatable kayaks have been around for a while. In this article, I’m discussing each factor that I’ve considered when comparing these two brands and their products. I’ll also only be recommending the top 3 Sea Eagle and Intex inflatable kayaks (one person and two person options). Let’s dive in:

#1. Quality and Build

The durability and quality of an inflatable kayak are important factors to consider when buying one.

The Sea Eagle inflatable kayaks are constructed with high-quality materials and a drop-stitch construction that make them durable and long-lasting.

The Intex kayaks, on the other hand, are made with PVC material, which is not as sturdy as the materials used in Sea Eagle kayaks.

Therefore, Sea Eagle kayaks tend to be a better choice for those who want a kayak that will last for years.

#2. Performance on the Water

Razorlite 473rl

Performance is another crucial factor that you should keep in mind when buying an inflatable kayak. The Sea Eagle kayaks are designed for good stability, speed, and agility, while the Intex kayaks are not as quick or maneuverable. Moreover, Sea Eagle kayaks also have a higher weight capacity than Intex kayaks.

If you plan to take a lot of gear with you or if you’ll be kayaking with another person, Sea Eagle is the better choice.

#3. Ease of Setup

The ease of setting up an inflatable kayak is also something you need to consider before buying one.

The Sea Eagle kayaks have a slightly more complicated set-up process than Intex kayaks, but they come with detailed instructions, and you can easily acquaint yourself with the process over time.

The Intex kayaks are simpler to set up, but they lack some of the features and accessories that you’ll find on Sea Eagle kayaks.

#4. Price Comparison

Another important factor that you need to consider is the price.

Intex kayaks are generally cheaper than Sea Eagle kayaks which makes them a good option for those who are on a budget.

However, Sea Eagle kayaks provide better value for money in the long run, as they are more durable and will last for several years. Therefore, if you have the budget to invest in a quality kayak, it’s recommended that you choose a Sea eagle inflatable kayak.

How Durable are Sea Eagle Kayaks?

Sea Eagle Razorlite 473rl

Sea Eagle kayaks are made from high-quality, drop stitch construction that make them extremely durable and long-lasting. In fact, they can withstand up to 3,000 lbs of pressure per square inch – meaning you can rest assured that your Sea Eagle inflatable kayak will be able to take whatever the elements throw at it!

Where is Sea Eagle Manufactured?

Sea Eagle kayaks are designed and constructed in the USA. The company is based in New York and they use only the highest quality materials to manufacture their products, ensuring that you get a durable and reliable product that will last for years.

Where is Intex Manufactured?

Intex kayaks are manufactured in China. Although Intex does produce some good quality products, the material they use is not as sturdy as what you would find in Sea Eagle kayaks. So if you’re looking for a kayak that will stand up to the elements and provide lasting performance, then Sea Eagle is your best bet.

Can One Person Use the Sea Eagle 370?

Sea Eagle Sport 370 In Use

Yes, the Sea Eagle 370 is designed for one person and it can support up to 500 lbs of weight. It’s lightweight and easy to maneuver so you should have no problem using it as a single kayaker. It’s also one of the best options out there in terms of an inflatable kayak.

Which Sea Eagle Kayak is the Best?

The Sea Eagle 380X is one of the best inflatable kayaks that Sea Eagle has to offer. It’s designed for up to three people and can support a total weight of 1,500 lbs. It also comes with a hull constructed from high-quality drop stitch material, making it extremely durable and reliable.

Which Intex Kayak is the Best?

The Intex Challenger K1 is one of the best inflatable kayaks that Intex has to offer. It’s perfect for beginner and intermediate paddlers, as it’s designed with stability in mind. It also comes with an adjustable seat and is lightweight and easy to transport.

Which One Should You Get?

Sea Eagle kayaks are typically better in terms of quality, performance, and ease of setup but they cost more.

Intex kayaks, on the other hand, are cheaper, simple to set up, and come with relatively lesser features and accessories compared to Sea Eagle kayaks.

If budget isn’t an issue, I’d go for a Sea Eagle 3 Person kayak or the Sea Eagle RazorLite as my top two options and then the Intex 68310VM Dakota K2 as my third option (if you need a budget option).

Both Intex and Sea Eagle have been around for quite a few years so whichever inflatable kayak you end up choosing should serve you well.

How to Paint a Kayak

If you’ve had your kayak for a while, you might be getting the itch to change its color. If so, you’ll be glad to know that you can definitely switch it up when it comes to painting your kayak another color.

In fact, I painted my kayak from a dull green to a beautiful, bright yellow a couple of years ago and am getting the itch to change it again.

Can You Paint Your Kayak Another Color?

With that said, with the right preparation, materials, and tools, you should have no problem transforming your kayak into something truly unique and you. This article will provide instructions on how to paint your kayak so that you can make sure the job is done right!

What You Will Need to Paint Your Kayak Another Color

To accomplish this fun task, you will need the following supplies:

  • Paint
  • Brushes
  • Sandpaper
  • Primer
  • Safety gear

Preparing Your Kayak Before Painting It

You’ll be using sandpaper or steel wool to remove any existing paint or oxidation before applying new coats. Apply two coats of primer to seal in any cracks or blemishes on the surface before you start painting.

Specific Type of Paint for Your Kayak

You’ll need a good quality paint specifically designed for boats or kayaks. The type of paint will depend on the material your boat is made of. Marine-grade epoxy paint works best on fiberglass kayaks while others will do well with a regular marine-grade paint. Wood kayaks, on the other hand, would look best with different kinds of stains instead of paint.

Make sure to choose a color that stands out against the color of the water and any other craft surrounding it if you want to for safety purposes. My kayak is bright yellow so everyone can see me and there’s no confusion while I’m out on the water.

You may also want to invest in bottom paint if you plan on taking your kayak into saltwater environments. Bottom paint will protect your kayak from sea life like barnacles, algae, and other things that can create problems.

Airbrushes will provide more even coverage with fewer brushstrokes. In my experience, spray painting outside was a mistake because it ended up getting on everything since it was so breezy outside. Now I spray paint inside my garage with the door open and a mask on for protection.

Finally, you’ll need something with which to protect your newly painted kayak once it’s complete. Marine varnish is recommended as it provides a hard surface that’s resistant to UV radiation and saltwater corrosion.

Once applied, multiple coats should have time in between to completely dry before launching back into the water.

Selecting Colors For Your Kayak

When choosing the perfect color scheme for your kayak, you want to consider both aesthetics and practicality. Colors can add personality and style to your boat, but you should also consider functionality for the type of environment you plan to paddle in.

Bright colors like red, yellow, and orange are often favored as they are highly visible in most settings. They also help make it easier to spot people who might be capsized or otherwise in trouble out on the water.

However, depending on where you are paddling, bright colors may also attract unwanted attention from larger marine animals such as whales or sharks. In this case, more subdued colors like navy blue or forest green might be a better choice as they blend in with the natural environment more effectively.

The Importance Of A Clear Top Coat

two different types of kayaks

Adding a clear top coat to your painted kayak is an important step in preserving the color and finish of your project. I didn’t know that when I first painted my own kayak and the paint started cracking and chipping off. When applied, in the form of a varnish or epoxy resin, it will provide added protection from UV damage, salt water exposure, abrasion, and chemical erosion.

The application process is fairly straightforward regardless of which product you choose but be sure to read manufacturer’s instructions on proper application method and safety precautions before beginning. You’ll want to apply several thin layers of varnish onto a clean surface with either a brush or roller for even coverage.

You may need to sand between coats with fine grit sandpaper if specified in the instructions and/or if there are noticeable irregularities in the coating upon inspection.

Finally, allow adequate drying time in between coats as well as after all layers have been applied, according to manufacturer’s specifications.

By following these steps when adding a clear top coat to your painted kayak, you can expect years of protection from the elements while preserving its aesthetic beauty for many days on the water ahead!

How Else Can I Decorate My Kayak?

Popular decorations for kayaks include brightly-colored paints, stickers, and unique decals. If you’re feeling daring, some kayakers even go so far as to install lights or glow-in-the-dark strips along the sides of their kayaks.

Waterproof vinyl stickers can be applied to give extra visual interest and show off an owner’s personality. Decals with pictures or quotes are also popular choices when it comes to decorating your kayak.

Hull wraps are another option for more adventurous owners. With this option, you can choose from prefabricated designs or have custom work done to create a unique look for your boat. It’s important to note that these wraps need to be particularly resilient as they must withstand constant exposure from saltwater and sunlight without fading or peeling.

If you want your boat to really stand out on dark nights or foggy mornings, you may opt for installing LED lighting strips along the hull of your kayak. These narrow strips come in different colors and emit light when powered by batteries, giving off a cool aquatic vibe and providing improved visibility at night while paddling.

Another nighttime decoration that has become increasingly popular is glow in the dark tape which glows after absorbing light during daytime hours, making it easy to find your way back home through murky waters!

How Do You Paint Polyethylene Plastic?

Polypropylene material

Polyethylene plastic is a great material for kayaks, but it can be tricky to paint. Before getting started, you will need to sand the surface of your kayak with a finer grit sandpaper and then wash it off with soapy water. This will help ensure that the paint adheres properly to the surface.

You’ll also want to use a special type of paint designed for plastic surfaces, such as a two-part epoxy paint. This kind of paint will provide the best results and greater durability over time.

To apply the paint, start by using a foam brush to lay down an even coat of paint, making sure to cover all areas. After the first coat is dry, add a second layer of paint and let it dry completely before applying any additional coats.

After the paint is completely dry, you can add a clear topcoat to provide extra protection from UV radiation and other elements. Be sure to read the manufacturer’s instructions on proper application and safety precautions prior to beginning.

How Do You Change the Color of a Plastic Kayak?

kayak flipping over

Changing the color of a plastic kayak is an easy project that can be done in a couple of different ways. The first option is by using spray paint specifically designed for plastic surfaces. This type of paint will adhere to the polyethylene material and provide a durable finish.

The other type option is to use vinyl wraps. These come in a variety of colors and patterns, and they will give your kayak a professional finish that can be easily removed or changed if needed.

What Paint to Use on a Fiber Glass Kayak?

When painting a fiberglass kayak, it is important to use the right kind of paint. The most common type of paint for fiberglass kayaks is marine-grade epoxy paint. This type of paint provides superior protection against water and UV damage and can be applied over existing layers of paint.

Epoxy paints are also beneficial because they can be applied in multiple layers for additional protection and durability. When selecting a color, make sure to choose one that is suited for the environment in which you plan to paddle.

Other types of paints such as acrylic or latex may also work well on fiberglass kayaks, but they will not provide the same level of protection and may require more frequent touch-ups.

Final Thoughts

Painting a kayak that is worn out from years of wear and tear can bring life back into it in a fun way. Even if it’s just that you don’t like the original color, you can add your own style to it by adding multiple colors, decals, and/or stickers.

Remember to be safe and paint outside or wear a mask while painting/spraying inside for proper ventilation and if doing this outside, be aware of the wind.

Most of all, enjoy the process and have fun.

Depth Finder vs Sonar: What Serves Kayakers Better?

Kayakers need the proper equipment for a successful and safe time on the water. Two common tools that many kayakers consider are a depth finder and a sonar. While these two items may seem similar, they are actually quite different.

In this blog post, I’ll be sharing my experience with both and helping you take a closer look at the differences between depth finders and sonars and explore which one is best suited for kayakers.

The Difference Between a Depth Finder and a Sonar

First, let’s define what is meant by a depth finder and a sonar.

A depth finder is a device that uses sound waves to determine the depth of water beneath the kayak. It usually displays the information on a screen, typically in feet or meters.

On the other hand, sonar is a device that not only measures the depth of water but also detects objects under the water, such as fish, rocks, and even the structure of the lake or river bed. It typically displays more detailed information on a screen, including pictures of what it detects.

Depth Finders Are Great For Safety

While both these devices are great tools to have, a depth finder is likely sufficient for most kayakers.

Understanding how deep the water is beneath you can help prevent grounding or capsizing in shallow waters, and can make it easier to choose the best fishing spots. Depth finders are also more affordable and typically easier to install than sonars.

Sonar is Better For Fishing

However, if you’re interested in fishing or exploring new waterways, a sonar might be the better option.

Sonars can provide more detailed information such as the location of fish that can be useful for anglers.

Additionally, sonars can help kayakers better understand the water they’re paddling in. This information can be especially helpful for navigating through rocky areas or avoiding unexpected underwater hazards.

Cost Comparison Between Both

One important factor to consider when deciding between a depth finder and sonar is how much you’re willing to spend. Sonars are typically more expensive than depth finders and can also require more complex installation.

You definitely make sure to consider your budget and experience when making your decision.

Is a Sonar Better in Deeper Waters?

Another consideration is your kayaking environment. If you often paddle in very shallow waters and calm conditions, a depth finder is likely sufficient.

However, if you often paddle in deeper waters or more challenging conditions, a sonar may provide additional benefits and safety measures.

Does a Depth Finder Use Sonar?

Yes, a depth finder uses sonar technology to measure the depth of water beneath the kayak but it’s not as good as a fish finder when it comes to detecting objects under the water.

What Frequency Beam Does a Depth Finder Use?

Depth finders use low-frequency sound waves to measure the depth of water beneath a kayak. The frequency range is typically between 30 and 200kHz, depending on the make and model of the device.

Is Down Imaging Better than Sonar?

Down Imaging is a type of sonar technology that uses high-frequency sound waves to create detailed images of what is under the water.

It’s generally considered more accurate than traditional sonar and can provide useful information about underwater contours, fish locations, and more.

Does Sonar Work in Shallow Water?

a fish finder on a kayak

Yes, sonar can be used in shallow water but it is typically more accurate and reliable in deeper waters. This is because the sound waves are used to measure the depth of water and detect objects traveling farther in deeper waters.

Does a Depth Finder Work Well in Shallow Water?

Yes, a depth finder works well in shallow water since it is designed to measure the depth of water beneath the kayak. It may not be suitable for detecting objects under the surface or getting detailed information about underwater contours and fish locations, however.

What is the Difference Between Sonar and Down Imaging Fish Finder?

Down imaging is a type of sonar technology that uses high-frequency sound waves to create detailed images of what is under the water. It’s generally considered more accurate than traditional sonar and can provide useful information about underwater contours, fish locations, and more.

By comparison, traditional sonar only provides basic depth readings and can be less reliable in shallow waters.

Is a Transducer and a Sonar the Same?

No, a transducer is a device that converts electrical signals into sound waves.

Sonar is the technology used to measure the depth of water beneath a kayak and detect objects under the water.

Transducers are often used in conjunction with sonar to create and transmit sound waves.

Conclusion

In conclusion, kayakers have a couple of options when it comes to underwater navigation tools. Both a depth finder and sonar can be valuable additions to your gear collection, depending on your specific needs.

Personally, fish finders work well for me (I love to go fishing in my kayak) and I’ve become very comfortable with them. Depth finders were a little harder for me to setup and understand how to use but which one you choose should depend on what you’re looking for.