Why Do Kayaks Have Bungs?

Bungs is a funny term, isn’t it? If you’re wonder what bungs are and why kayaks have them, I can explain that to you.

And no, no matter how much the term reminds you of the Beavis and Buttheads bunghole jokes, this is an entirely different matter.

So, WTFudge Are Bungs?!

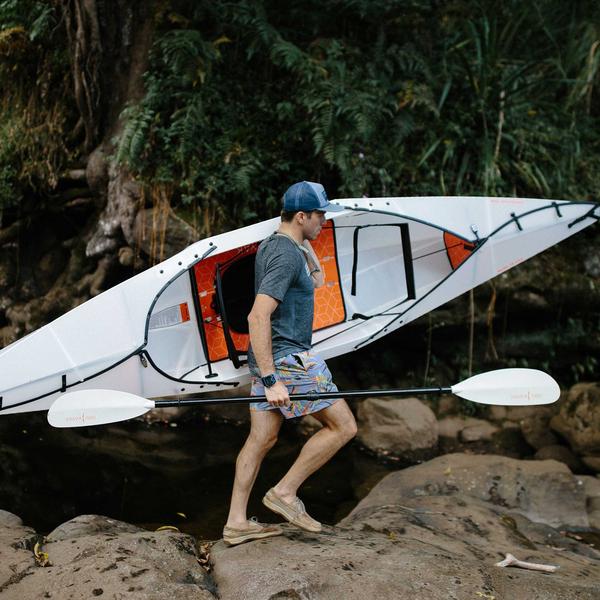
For those new to kayaking, the term “bung” might sound like a foreign word but it’s actually an important feature found on most kayaks.

A bung is a type of drain plug that’s designed to help you remove water from the kayak easily. It’s a God send!

Why Do Kayaks Have Bungs?

someone enjoying their sit-in-kayak

Some kayaks have small drain holes along the edges or the bottom, which can allow water to drain out gradually.

However, if you’ve capsized or taken on a significant amount of water, a bung can make all the difference in quickly removing the excess water. Removing the water helps to reduce the overall weight of the kayak and can make paddling much easier.

Think of it as a quick way to dump a crazy excess of water like in an emergency situation.

How Many Types of Bungs Are There?

There are several different types of bungs found on kayaks including threaded, pop-up, and twist and lock bungs.

#1. Threaded Bungs

Threaded bungs require you to screw them in manually and are typically found in kayaks that are designed primarily for touring purposes.

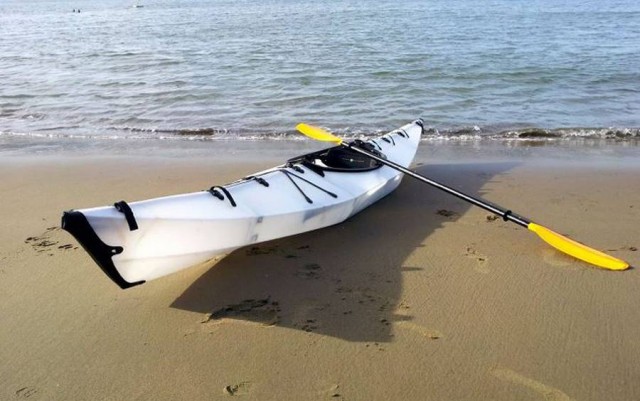
Threaded bungs are usually made from a strong, durable material such as metal or plastic that is resistant to corrosion. They’re also typically located near the stern of the kayak.

#2. Pop-up Bungs

Pop-up bungs are designed to pop open when pressure is applied from inside the kayak and can be closed manually once water has been released. They’re usually made from a flexible material such as rubber or plastic and are often located near the bow of the kayak.

Pop-up bungs are a great choice for recreational kayaks as they’re easy to use and require minimal effort from the paddler.

#3. Twist and Lock Bungs

Twist and lock bungs are designed to twist open when pressure is applied from inside the kayak, then twist back shut after the water has been released. They are usually made from a strong, durable material such as metal or plastic and can often be found near the stern of the kayak.

Twist and lock bungs offer more security than other types of bungs as they don’t require any manual effort to open or close them.

How Do You Maintain a Bung?

As with any gear, it’s essential to maintain your bungs properly to keep them working effectively.

Inspect your bungs regularly for any cracks or damage and replace them if necessary. If you’re planning on storing your kayak for an extended period, you’ll need to remove your bung and ensure that it’s fully dry before storing it away.

Salt buildup can also affect the performance of your bungs, so it’s a good idea to rinse your kayak down after every use.

What are the Benefits of Bungs?

Not only do bungs help remove water from your kayak quickly, but they can also provide ventilation and air circulation inside the kayak. This can help to prevent any mold or mildew buildup, which can be especially important if you’re storing your kayak in a damp environment.

Additionally, bungs can provide a handy access point for inspecting and cleaning your kayak’s interior.

What Do You Do If Your Bungs Isn’t Functioning Properly?

If you’re experiencing any issues with your bungs, it’s important to troubleshoot them before heading out on the water. If you’re finding that your bung isn’t draining effectively, try tilting your kayak in different directions to help the water flow towards the drain hole.

Lastly, you might need to clean any debris or buildup around your bung to ensure that it’s working correctly.

Are Bungs the Same as Scupper Plugs?

No, bungs and scupper plugs are not the same. Scupper plugs are designed to prevent water from entering your kayak while bungs are used to remove excess water that has already entered.

Can You Drown Without Bungs?

Yes, you can drown without bungs although it would take a significant amount of water entering the kayak for that to happen. It’s always important to ensure your bung is properly attached and functioning correctly before heading out on the water.

How Many Bungs Should Be On One Kayak?

The number of bungs on one kayak can vary depending on the design and size of your kayak. Generally, you’ll find two or three bungs attached to a recreational kayak, while touring or sea kayaks may have up to five.

Is It Dangerous to Seal a Bung?

Yes, it can be dangerous to seal a bung as this could result in a build up of pressure and air inside the kayak. Without an available outlet for air to escape, pressure will build up inside the hull which can cause it to crack or even burst. It’s always best practice to keep your bungs open when possible.

Conclusion

Bung plugs are a small but crucial part of any kayaker’s gear. They’re designed to remove water quickly, help with ventilation and air circulation, and provide access to the interior of your kayak. Make sure to familiarize yourself with how they work before going out for a long kayaking session.

Understanding how to maintain your bungs properly and troubleshoot any issues that arise can help to ensure that your kayak stays in excellent condition for years to come.

Fish Finder vs Side Imaging: WTF Is The Difference & Which One Will Help You?

Fishing has been one of my favorite pastime activities and I know it is for a lot of you too! Whether you’re a seasoned angler or just a beginner, the latest technological advancements in fishing equipment are making it easier to catch fish and have more successful fishing trips.

Two of the most popular tools for fishing enthusiasts today are fish finders and side imaging. These devices revolutionize the fishing game by providing more accurate information about what’s happening beneath the surface of the water.

However, the question is, which tool is better for your kayak fishing adventures? What does each one do? It can be confusing to learn about these so in this article, I will discuss what each one does, how each one can help, and then see which one is best suited for your needs. With that said, let’s take a look under the water (pun intended!)

The Differences Between Fish Finders and Side Imaging Devices

fish finder setup

Fish Finders are the go-to tool for many anglers because of their simplicity and accuracy. I own three of these and love them for the ease of use of locating fishies!

These electronic devices use sonar technology to locate fish, water depth, and underwater structures and come in various forms. Most fish finders come equipped with a display screen that shows a 2D image of what’s happening beneath the kayak.

With a fish finder, you can quickly and easily determine where fish are located, and then strategically plan your next move. These devices are particularly useful for kayak fishing because they allow you to navigate shallow waters without the risk of damaging your equipment.

On the other hand, side imaging offers a more sophisticated approach to fishing. This advanced technology generates detailed, high-resolution images of the lake or ocean bed, providing anglers with a clearer, three-dimensional view of what is happening beneath the surface.

Side imaging can also reveal underwater vegetation, rocks, and other structures that can help you find fish. However, the downside to side imaging is that it requires more time to learn and operate which may discourage some anglers.

Price Differences Between Fish Finders and Side Image Devices

someone using a fish finder

Another deciding factor for kayak anglers choosing between fish finders and side imaging is the price.

Fish finders tend to be more affordable while side imaging devices come with a hefty price tag. If you’re a beginner who wants to test the waters without breaking the bank, a fish finder is certainly the best option.

However, if you’re willing to invest in a high-quality device, side imaging could be the game-changer that takes your fishing to the next level.

The type of fishing you engage in can also determine which technology to use. For shallow water fishing, where the fish are more visible, a fish finder may be sufficient.

But for deep-sea fishing or fishing in large bodies of water such as lakes, ponds, or rivers, a side imaging device is highly recommended. This is because these bodies of water typically have more underwater structures, which in turn, means more fish to catch.

Is a Fish Finder the Same as Side Imaging?

No, while they both use sonar technology to detect objects in the water, they are not the same.

A fish finder is designed to locate and track fish based on their movements and underwater structures.

Side imaging devices generate detailed images that reveal much more data than just fish locations. They also give you visuals on other objects such as underwater vegetation, rocks, and more that can help you locate fish.

Which One Should I Get: Fish Finder or Side Imaging Device?

a fish finder on a kayak

The answer truly depends on your fishing needs and experience level. If you’re a beginner, a fish finder is likely the best choice since it’s easier to use.

More experienced fishermen, however, may opt for a side imaging device to get an even more detailed view of what’s happening beneath the surface.

Both are extremely helpful to use when kayak fishing!

What are the Disadvantages of Fish Finders When Compared to Side Imaging?

The main disadvantage of a fish finder is that it can only provide basic information such as the water’s depth and fish locations.

As explained earlier, side imaging devices provide a much more detailed view of what is happening beneath the surface.

Now, personally, I did find it much harder to operate side imaging but once I got familiar with it and when I’m in deeper waters, I tend to use my side imagine device. In shallow waters, my fish finders are a life saver!

How Shallow Will Side Imaging Work?

Side imaging technology works best in depths of up to 300 feet although it does have some advantages over traditional fish finders in shallower waters.

Side imaging can provide more detailed images and data about the underwater environment which can be beneficial if you’re fishing in shallow water or areas with a large amount of vegetation or debris.

How Shallow Will Fish Finder Work?

a-fishing-kayak-ready-to-for-a-trip-with-a-fish-finder-setup

Fish finders can typically work in depths of up to 300 feet or even deeper depending on the model.

However, they tend to be more reliable and accurate in shallow waters since they emit fewer signals that can interfere with the sonar readings.

Conclusion

The decision to choose a fish finder or side imaging device for your kayaking adventures depends on various factors such as your budget, the type of fishing you practice, and your experience level.

I find that both devices have their pros and cons and both are helpful given what environment you’re in. I’ve caught fish using both devices and the job is made so much easier when using either one.

Whatever you choose, make sure to learn how to effectively use the device and take advantage of all the features it has to offer!

How Long Will an Oru Kayak Last? Exploring Durability & Long-Term Performance

For a long, long time, kayaking was an activity that required room and space if you wanted to own a kayak. That was until the Oru kayak was released: it was one of the first folding kayaks in its class that was built with durability, longevity, and space in mind. These collapsible boats are constructed from high-quality materials and can be stored and transported with ease.

Hands down, because I live in an apartment and own a small car, the Oru kayak is one of the best purchases I’ve made in life. But before you buy it, you may have the following question:

Realistically, How Long Will the Oru Last?

folding kayak on the water

The question of durability is an important one when it comes to any purchase, especially if the item you’re buying costs more than the average. The Oru kayak is no exception and its longevity depends mainly on how much care you give it.

If you’re using your folding kayak mostly for recreational purposes, then with proper maintenance and storage, it can last up to 15 years or more. It’s important to keep the kayak clean and dry after use, as well as store it in a cool place out of direct sunlight. This will help ensure that the components won’t crack or weaken over time.

If you plan on using your Oru for more intense activities, like touring or even whitewater kayaking, then you should expect to replace it every 5-10 years or so. The more wear and tear the kayak goes through, the shorter its lifespan will be. You may also need to replace some of the parts periodically due to normal wear and tear, but as long as you take good care of your Oru kayak it should still last you for many years to come.

Best Folding Kayak
Oru Kayak BayST Folding Kayak - White
Check Price on Amazon
We earn a commission if you make a purchase, at no additional cost to you.

It’s important to note that the Oru kayak is not indestructible so it should be handled with love and care and given regular maintenance and attention in order to get the most out of it.

If you take proper care of your Oru kayak, then it should last for many years and give you countless hours of fun out on the water like mine has for me!

The Basics of the Oru

folding kayak

Before diving into the topic of durability, it’s important to understand the basics of Oru Kayaks. These boats are built from lightweight but sturdy materials like polypropylene and ABS plastics.

They feature an origami-inspired design that allows them to be easily folded down to manageable sizes for storage. Users can assemble and disassemble an Oru Kayak with ease thanks to the intuitive snap-lock system, and the compact design means that these boats can be taken anywhere – from the trunk of a car to the overhead compartment on a plane. Which in itself is absolutely incredible.

The Durability of Oru’s Construction Materials

One reason why Oru Kayaks are so popular among outdoor enthusiasts is that they are constructed from materials that can withstand a great deal of wear and tear. The polypropylene outer layer is highly water-resistant and offers excellent UV protection from the sun.

Meanwhile, the ABS plastic rib supports provide strength and stability without adding excessive weight to the kayak.

The overall design of the Oru Kayak is engineered to maximize durability, with minimal stress points that can cause wear and tear over time.

It’s Made for Long-Term Performance

Best Origami Kayak!
Oru Kayak Foldable Kayak
Check Price on Amazon
We earn a commission if you make a purchase, at no additional cost to you.

Despite their unique design and lightweight construction, Oru Kayaks are built to last. With proper care and maintenance, these boats can be used for a decade or more without any noticeable decline in performance.

When compared to traditional hard-shell kayaks, the Oru offers a significant advantage in terms of longevity.

Traditional kayaks are often subject to cracks, scratches, and damage from harsh weather and rough handling. In contrast, the Oru Kayak is more durable than an inflatable kayak but still lightweight and easy to transport.

How Many Times Can You Fold an Oru Kayak?

Oru kayaks are designed to be folded and unfolded as many times as necessary. With proper care and maintenance, these boats can withstand hundreds of folding cycles without any loss in performance or durability.

Of course, regular wear and tear from use will eventually cause the components of the kayak to weaken over time, but with proper storage and maintenance the Oru Kayak should last many years.

Can an ORU Kayak Sink?

folding kayak

No, the Oru kayak is designed to be unsinkable. The construction materials are highly buoyant and allow the boat to stay afloat even in rough seas and choppy water.

However, it’s important to remember that no kayak is completely unsinkable and if the boat takes on enough water or has a puncture or tear then it will eventually sink. That is why it’s important to practice safety and be aware of the conditions before you head out on the water.

How Do You Drain an ORU Kayak?

To drain your Oru kayak, open the drain plug at the stern of the boat. You may want to use a pair of pliers if it is stuck or difficult to turn.

Let gravity do its job – you should see water draining out the back of the kayak.

Once most of the water has drained, close the plug and make sure it is tightly sealed. You can then dry out the kayak with a towel or air it out in the sun until completely dry.

How Do You Take Care of an ORU Kayak?

on the water

Taking care of your Oru kayak is essential for ensuring that it will last you many years. After each use, be sure to rinse off the boat with fresh water and dry it completely with a towel. This will help protect the materials from saltwater corrosion and keep the Oru looking like new.

Also, make sure to store your kayak in a cool, dry place with plenty of air circulation. This will help prevent the components from cracking or weakening over time.

If you plan on leaving your kayak out for extended periods of time, make sure to cover it up with a tarp or waterproof fabric to protect it from sun and rain damage.

Best Origami Kayak!
Oru Kayak Foldable Kayak
Check Price on Amazon
We earn a commission if you make a purchase, at no additional cost to you.

Finally, inspect your Oru kayak periodically for signs of wear and tear or damage. If you notice any issues, be sure to address them as soon as possible. By following these simple tips, you can ensure that your Oru kayak will remain in excellent condition for many years to come.

Conclusion

An Oru Kayak is an excellent investment for anyone who loves kayaking but does not have the space for a traditional hard-shell kayak. I know I personally love mine and when I’m out for a solo trip and no one to help me carry a kayak, it comes in so handy!

With proper care and maintenance, an Oru Kayak can last for years, providing a lightweight, easy-to-use watercraft that can be taken anywhere.

Whether you are an experienced kayaker looking to explore new waterways or a beginner who wants to dip their toes into the sport, an Oru Kayak is a smart and reliable choice.

Can One Person Use a Two Person Kayak?

If you own or plan on renting a two person kayak, you may be wondering if it’s possible to use it as a solo paddler. The great news is that one person can definitely use a two person kayak!

I’ve done it several times but before hitting the water on a two person kayak by yourself, there are some things you should consider.

In this blog post, I’ll explore the question of whether one person can use a two person kayak and offer some tips to make your solo kayaking experience safe and enjoyable.

Benefits of Using a Two Person Kayak Solo

Unison 136T

One of the main benefits of using a two person kayak solo is that you have the entire kayak to yourself. This means that you can stretch out your legs, bring more gear, and have more control over the kayak’s movements.

Also, solo kayaking provides a sense of freedom and independence that can be truly liberating. But it’s important to note that some two person kayaks may be more difficult to paddle solo especially if they are longer or have a wider beam. In these cases, be prepared for a bit of a challenge.

Choosing the Right Kayak for Solo Use

If you’re planning on using a two person kayak solo, it’s important to choose the right one for the job. Look for kayaks that are shorter and have less bulk, as these will be easier to maneuver and control.

Lastly, make sure that the kayak has a smaller cockpit, as this will help you maintain better control over the kayak’s movements. Some kayaks may also have adjustable seats that can be moved closer together for solo use.

Please do your research and talk to kayaking experts to find a kayak that is suited for your individual needs.

Safety Considerations

training for water safety

There are a few things to take into consideration when it comes to your safety. Solo kayaking requires additional safety measures to be put in place.

Always wear a personal flotation device (PFD) when paddling, and make sure that your kayak has a working spray skirt or cover to keep water out of the cockpit.

It’s also a good idea to carry a whistle or other signaling device, as well as a waterproof bag for your cell phone or other valuables.

One last thing I highly suggest is to be sure to check the weather and water conditions before heading out on your solo kayaking adventure.

Paddling Techniques for Solo Kayaking

girls on an Apollo kayak

When paddling a two person kayak solo, there are some techniques that can improve your efficiency and control.

One technique is the J-stroke, which involves paddling in a slight J-shaped motion to keep the kayak straight.

Another is the sweep stroke, which is used to turn the kayak. Practice these techniques in calm water before attempting them in more challenging conditions.

Finally, make sure that you have a good understanding of basic kayaking techniques and safety protocols before venturing out on your own.

What’s The Best Two Person Inflatable Kayak To Paddle Solo?

When looking for a two person inflatable kayak that can be used solo, consider the following 5 tandem kayaks:

#1. Sevylor Coleman Colorado Two-Person Kayak: This kayak is designed for two people but can also be used solo. It has adjustable seats and an inflatable I-beam floor that provides rigidity and stability. The kayak includes a pump, oars, and carrying bag for easy portability.

#2. Driftsun Voyager Two Person Inflatable Kayak: This kayak is designed for two people but can also be used solo. It has an adjustable inflated backrest and comes with two paddles, a pump, and a carrying bag. The kayak is lightweight and easy to transport.

#3. Intex Explorer K2 Two Person Inflatable Kayak Set: This kayak is designed for two people but can also be used solo. It’s made from durable, puncture-resistant vinyl and comes with aluminum oars, a pump, and a carrying bag.

#4. Sea Eagle SE370K_P Inflatable Kayak: This tandem kayak can be paddled by one or two people. It’s made from puncture-resistant material and has an inflatable I-beam floor for added rigidity and stability. The kayak includes two paddles, a pump, and a carrying bag.

#5. AIRHEAD Montana Two Person Inflatable Kayak: This kayak is designed to carry one or two people. It’s made from heavy-duty vinyl and includes two paddles, a pump, and a carrying bag. The kayak also has an inflatable I-beam floor for added stability.

Is it Hard or Easy to Use a Tandem Kayak Alone?

a bigger couple kayaking together comfortably

Using a tandem kayak alone is neither hard nor easy. It depends on the type of kayak you have, your skill level, and the water conditions.

If you are an inexperienced paddler or venture out in difficult water conditions, solo kayaking can be more challenging. You have to experienced in kayaking to be able to adjust to a tandem kayak well.

Where Does One Person Sit in a Two Person Kayak?

If you are paddling solo, then you should sit in the middle of a tandem kayak, which is usually the most balanced spot. This position will give you better control over your kayak’s movements and will help you stay centered.

It’s also important to make sure that all necessary gear and supplies are within reach so that they can be accessed quickly if needed.

Depending on the size of your tandem kayak, you may also want to adjust the seats for solo use by moving them closer together. Doing so can help make paddling more efficient and comfortable.

Can You Use a 2 Person Inflatable Kayak with 1 Person?

Sea Eagle Razorlite on the water

Yes, you can use a two-person inflatable kayak with one person. As mentioned before, it is important to choose the right kayak for the job and adjust the seats for solo use if necessary.

Make sure to revisit the safety tips I discussed above!

Conclusion

In conclusion, one person can use a two person kayak, but it’s important to choose the right kayak for the job, practice safety precautions, and learn proper paddling techniques.

Solo kayaking can be a thrilling and rewarding experience, but make sure that you’re properly prepared and take the necessary safety measures before hitting the water. With the right mindset and a few basic skills, you’ll be amazed at the fun and excitement that solo kayaking can bring.

Can You Kayak In The Rain?

Kayaking is one of the most enjoyable outdoor activities especially during the summer months when the waters are calm and the weather is sunny and bright.

However, the weather can quickly change and sometimes it starts raining while you are kayaking.

If you’re a novice kayaker, you may wonder if it is safe to kayak in the rain. And the answer is yes, it is safe to kayak in mild rain. I have done it a few times when the weather changed unexpectingly.

3 Big Things to Consider Before You Go Kayak In the Rain

If you are a novice kayaker, then this is for you. There are a few things you need to consider and think about before you go off kayaking in the rain. Let’s discuss those now:

#1. Your Skill Level

The first thing to consider when kayaking in the rain is your skill level. If you are a beginner kayaker, it may be best to avoid kayaking in the rain especially if the weather forecast predicts heavy rainfall, strong winds, or thunderstorms.

On the other hand, if you are an experienced kayaker, you can safely kayak in light rain without much trouble. Make sure that you are confident in your paddling skills and have enough experience before you attempt kayaking in the rain.

#2. Type of Kayaking You’re Planning

The second factor to consider is the type of kayaking you are planning to do. If you are planning a leisurely kayak trip in calm waters, you can safely kayak in the rain.

However, if you are planning to do a more advanced kayaking activity like white water kayaking or open water kayaking, it’s best to postpone it until the weather improves.

These types of kayaking activities require a higher level of skill and experience, and you don’t want to risk getting into difficulties in inclement weather conditions.

#3. Your Equipment

Another important factor to consider when kayaking in the rain is the equipment you use. Make sure you wear appropriate waterproof and windproof clothing, such as a rain jacket and pants, gloves, and a hat.

Also, make sure that your kayak is equipped with proper safety gear like a life jacket, paddle leash, and navigation equipment like a GPS or compass. Make sure to also check the kayak’s hull for any damage or leaks before heading out in the rain.

#4. Weather Forecast

When kayaking in the rain, it is essential to monitor the weather forecast. If the weather is expected to worsen, it’s advisable to cut your kayaking trip short and head back to shore.

It’s also important to avoid rivers or waterways that are known to flood during heavy rainfall. Always err on the side of caution and stay alert to changing weather conditions and sudden currents.

Finally, make sure you have a dry set of clothes in a waterproof bag for when you get back to shore. Nothing is worse than being wet and cold in the rain with a breeze coming at you.

When Should You Not Kayak?

rain coming down unexpectedly while kayaking on the ocean

Even if you are an experienced kayaker, there are certain conditions that make it unsafe to kayak. It is important to never attempt kayaking in extreme weather conditions such as high winds or storms. I do not recommend kayaking when the wind reaches over 15 knots or if there are waves more than a foot high. That can quickly lead to dangerous situation in a moment’s notice.

It is also not safe to kayak during times of low visibility, such as in fog or heavy cloud cover.

Moreover, it is best to avoid paddling in areas where the water current is too strong or choppy, and always check for any hidden debris or underwater obstacles before heading out.

What Weather Conditions are Best for Kayaking?

The best conditions for kayaking are calm waters with very little wind and a bright sunny day. This way, you can enjoy the sights and sounds of your surroundings without having to worry about the weather.

If there is light rain or cloud cover, it’s still okay to kayak as long as you dress appropriately and stay alert to changing weather conditions.

How Do You Stay Dry Kayaking in the Rain?

essential gear for a kayaking and camping trip that is out in the sun, drying

If you want to stay dry while kayaking in the rain, make sure to wear a waterproof jacket and pants, along with gloves and a cap.

A spray skirt can also be of great help in keeping your legs dry. In addition, make sure that all the seams on your clothing are taped or sealed. I also highly recommend you to bring extra clothes for when you return back to shore.

Does a Spray Skirt Really Help In Keeping the Kayak Dry?

Yes, a spray skirt is an essential piece of equipment for any kayaker who plans to paddle in the rain. The skirt helps keep you dry by preventing water from entering the cockpit of your kayak, while also helping to protect your legs from splashes and waves.

Furthermore, the skirt also provides some additional insulation against cold weather and windy conditions.

Are Kayaks Safe in Thunderstorms?

No, it is not safe to be in a kayak during a thunderstorm. Lightning can strike water and cause severe electrocution because of the conductive properties of water.

If lightning hits the water near you, it can travel through the kayak and cause serious injury or death.

Conclusion

Kayaking in the rain can be a fun and exciting experience but it is important to take the necessary precautions if you decide to kayak in inclement weather. I’ve kayaked in light rain but have had some anxiety-ridden moments in unpredictable weather so please make sure to take weather forecasting seriously.

By taking your skill level, type of kayaking, equipment, weather forecast, and river conditions into account before embarking on a trip, you will ensure your safety and have a more enjoyable kayaking experience.

Always remember to put safety first above all else.